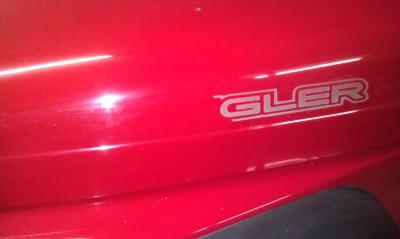
Joined the RedTJ club... Kinda

Forgot to mention... The arms adjusted to the same length as stock arms (which Metal Cloak told me they would not). I put it together at stock length first, but with the high pinion, the driveshaft was too long. I ended up stretching the lowers about 3/4 inch and adjusting the uppers to get the caster back and everything looks good. The trackbar does need 2+ inch lift to work though. I have it as short as it will go.
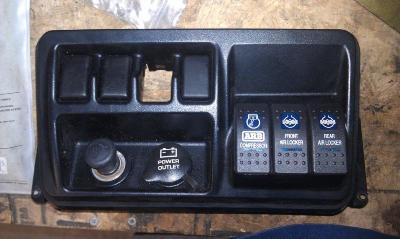
 
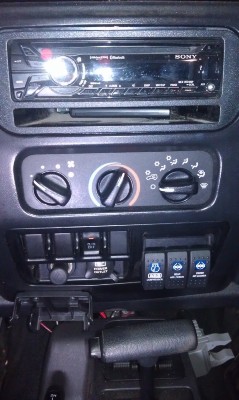
I got everything wired and the front locker plumbed Sunday and today. I was going to get the switches that fit in the factory knockouts, but decided to use the ARB switches to make things easier and to keep the blanks open in case I get hard top wiring in the future.

I put the switches in the flat space on the right side of the dash panel. The three switches barely fit, but it turned out pretty good.

IMAG0270_zps4e4521f4.jpg

IMAG0273_zpsc447c5b6.jpg

I have a small leak at the compressor (cycles around 2 minutes without the locker engaged) but I'll wait until I get it back with the rear installed to track that down.
 
I must have missed something. I thought you had an OX locker that you were determined to use.
 
Ouch..... I hope it was a good enough deal to get back out of!

It was free, so ended up spending a lot more but doing what I really wanted in the first place. But yeah, the Ox was in a Dana30 box with 30 paperwork but was for a 35...
 
When you are chasing the leak be sure to use hand tightening whenever you can. Don't use tools and "bo-up" because something will break. The directions say hand tighten and that's what they mean. Tighten just enough to get the leak stopped. I tightened mine without the air on wayyyyy too much and broke my compressor housing. The next one I just used my hand until the leak stopped.
 
I've been working on my list to be ready for this weekend at Uwharrie. I took all the fittings back off the compressor and used Teflon paste instead of tape. It was cycling every 1.5 minutes, now it held all the way to work (over an hour).

The last thing I need to do for now is mount the JKS storage pins for the disconnects. I can't get then out of the way of the tires.
 
Paid the Jeep off today! I realized I hadn't updated after the completion of the axle installs. I've taken it to Uwharrie and the Compound and it's really impressed me. My only issue at Uwharrie was ground clearance with the low skid plate. So, a UCF skid is on the list. I hope to get a few small projects checked off over the next couple of weeks and will post.
 
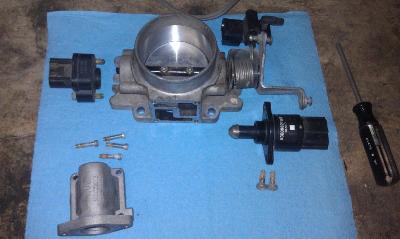
I've had some idle issues the past couple of weeks, and what sounded like a vacuum leak. I checked all the lines and couldn't find a leak, so decided to take a look at the idle air valve. I pulled the intake hose off and everything was pretty cruddy. So, this is how it sits tonight:

IMAG0369_zpsppf8ejxv.jpg

The idle air valve gasket fell apart when I took the housing off, and I can't find where I can buy one. Will check dealership tomorrow or RTV it.
 
Last edited:
Put it back together tonight and the idle may be better, but will have to drive it more to really know. It still whistles, and I couldn't find any leaking vacuum lines. Now I'm thinking intake manifold gasket?

What's the best thing to use to spray around the intake to check for leaks? Starting fluid?

And just FYI, the idle air valve housing gasket isn't available anywhere, even dealer, so I used rtv gasket maker.
 
Does the IAC not have a O ring for the seal?

It does, but the IAC housing to throttle body had a paper gasket that fell apart (the part in the lower left of picture that goes onto the surface of the throttle body that's facing the camera). That housing wouldn't have to be taken off to clean it, but I did...
 
Ah yea, I just figured it was really sealed by the O-Ring when I replaced mine. But mines also developed a skip again, and cleaning the IAC didn't fix it...so who knows. It's better but not gone completely.
 
Saturday I finally got around to adjusting the front upper arms to lower the pinion and get rid of a front driveshaft vibe. While under it, I noticed broken u-joint caps on the right front shaft. So, Ten Factory Chromos are on the way :).
 
I didn't take any pictures, but the Ten Factory shafts and new Timken bearings are in, and finally installed the Crown stainless brake lines. The right front shaft had two broken caps and the left front was dry to the point I could barely move it... Much better now.
 
Larry are you using one of those decal erasers that go on a drill or a heat gun and razor to remove the graphics? I have to get rid of 23 year old "decals" off my wrangler I have been thinking bout those erasers cause it is killing me to use the heat gun and razor. My decals are so old and dry.
 
Back
Top